It was one of the cold
days in March 2010 when I went to forest with my backpack filled with
diggers tools. When I came on spot there was last patches of snow
here and there, but it was clear that spring is inevitably arriving.
So I started searching around, and on seep hill side I
found this tree which was prepared last year. Actually, I did
found two on one spot, approximately 5 meters apart, next to hornbeam
No.11 was his bigger brother hornbeam
“Wild Boar”.
Trees were on spot where
they get hits from bigger and smaller rocks from nearby quarry. And
some big rocks were sitting right on the trunk of this tree, as you
can see on pictures. Mother nature with help from mining industry
formed this yamadori. Digging was relatively easy and tree was out in
about an hour. And from first moment I loved this tree. I had a
feeling it can be nice bonsai one day.
 |
| Hornbeam in September 2014 |
So the tree is Hornbeam
(Carpinus betulus).As quite common with this species it has
good nebari. Since it was growing inclined, in hard terrain, and
sitting directly on large rock buried below the tree roots are curved
downwards.
When brought home it was
potted into plastic bowl into mixture of zeolit and rough peat. For
this tree I used zeolit in fraction 4-8mm which proved to be good
decision retrospectively. Personally I favor this fractions for
bigger trees and have better results as with finer mixtures.
 |
| 3-2010 |
 |
| ...buried under large rocks oh hill side |
 |
| rocks are partially gone and tree is emerging. Fiskars on the picture is my best purchase related with collecting trees, cuts roots up to 40mm... |
So we were safe home and
there were only few things which could have been done. Do not move to
much, fertilize from first day with combination of organic and
chemical fertilizer and water a lot. I tried to place the tree on
sunny spot in the garden. I believe it is much better to promote its
growth.
 |
| first day in new home, in zeolit |
 |
| Add caption |
When I was thinking about
its future structure I was not sure where shorten original branches.
Since at that time I was in bonsai for first year it is no big
surprise. With such approach I was trying to be on safe side and not
to reduce tree to much, knowing I will have to reduce it later, after
season or two. It obviously slowed down development of the tree a
bit.
 |
| and with Dominika month after collection |
 |
| and 2 years later, April 2012, same Dominika and same tree ... |
 |
| ...in April 2014, Dominika and Maros Jr., who was born later than tree came to my garden :) |
|
 |
| March 2013 just before repotting |
 |
| new pot ready for the tree, mixture of zeolit and Keramzit with Osmocote feed |
 |
| ...and potted, finally. |
 |
| 3-2014 |
General structure of the tree was
discussed with Walter Pall when he was on
our workshop, back in 2011. So branches were reduced and later
carved to somehow more natural shapes. Last year I let grow long
branch which you can see on the picture fixed with wire to the big
root. I wanted to increase its thickness. Since it was partially
achieved I cut branch off now. New branches, one from top and second
from bottom of the original branch are wired and pointed in right
direction now. I will let them grow for few seasons undisturbed. This
way branch will have much better taper and structure.
 |
| 4-2011 with me, branches shortened and carved, basic structure remained till today. Only one branch died back on main trunk. |
 |
| 4-2012 |
 |
| 4-2013 |
Earlier pictures
were made with compact camera and therefore they are of lower
quality. Newer pictures are made with camera Nikon D90. With D90 I
use lenses Nikon35mm f/1.8G, mostly. This lenses are
relatively cheap and they are making fantastic pictures, even in bad
light conditions.
 |
| 4-2014, unfortunatelly moss from this picture died, new one used since summer 2014 |
 |
| 5-2011 |
 |
| 6-2012 |
 |
| 6-2013 |
The tree was several times wired. On
the beginning it was easy and fun. Last wiring was done this week,
and it was still fun, but not easy task anymore. It was not wired
last year and it made whole stuff this week more complicated.
Personally, I do not expect any
extensive wiring in the future, just minor correction maybe. So I
will watch much shorter movie (movies?) next time?
 |
| 7-2010 |
 |
| 7-2011 |
 |
| 10-2013 |
 |
| January 2015, before wiring |
As I wrote already in some of my
previous posts I would like to name some of my better trees. For this
one I was using name which no longer fits this bonsai anymore. Now I
think I will name it “The Yossarian”. Because bonsai hobby
must be also fun, and Catch-22
is on of my favourite books.
 |
| ...and after wiring, final result |
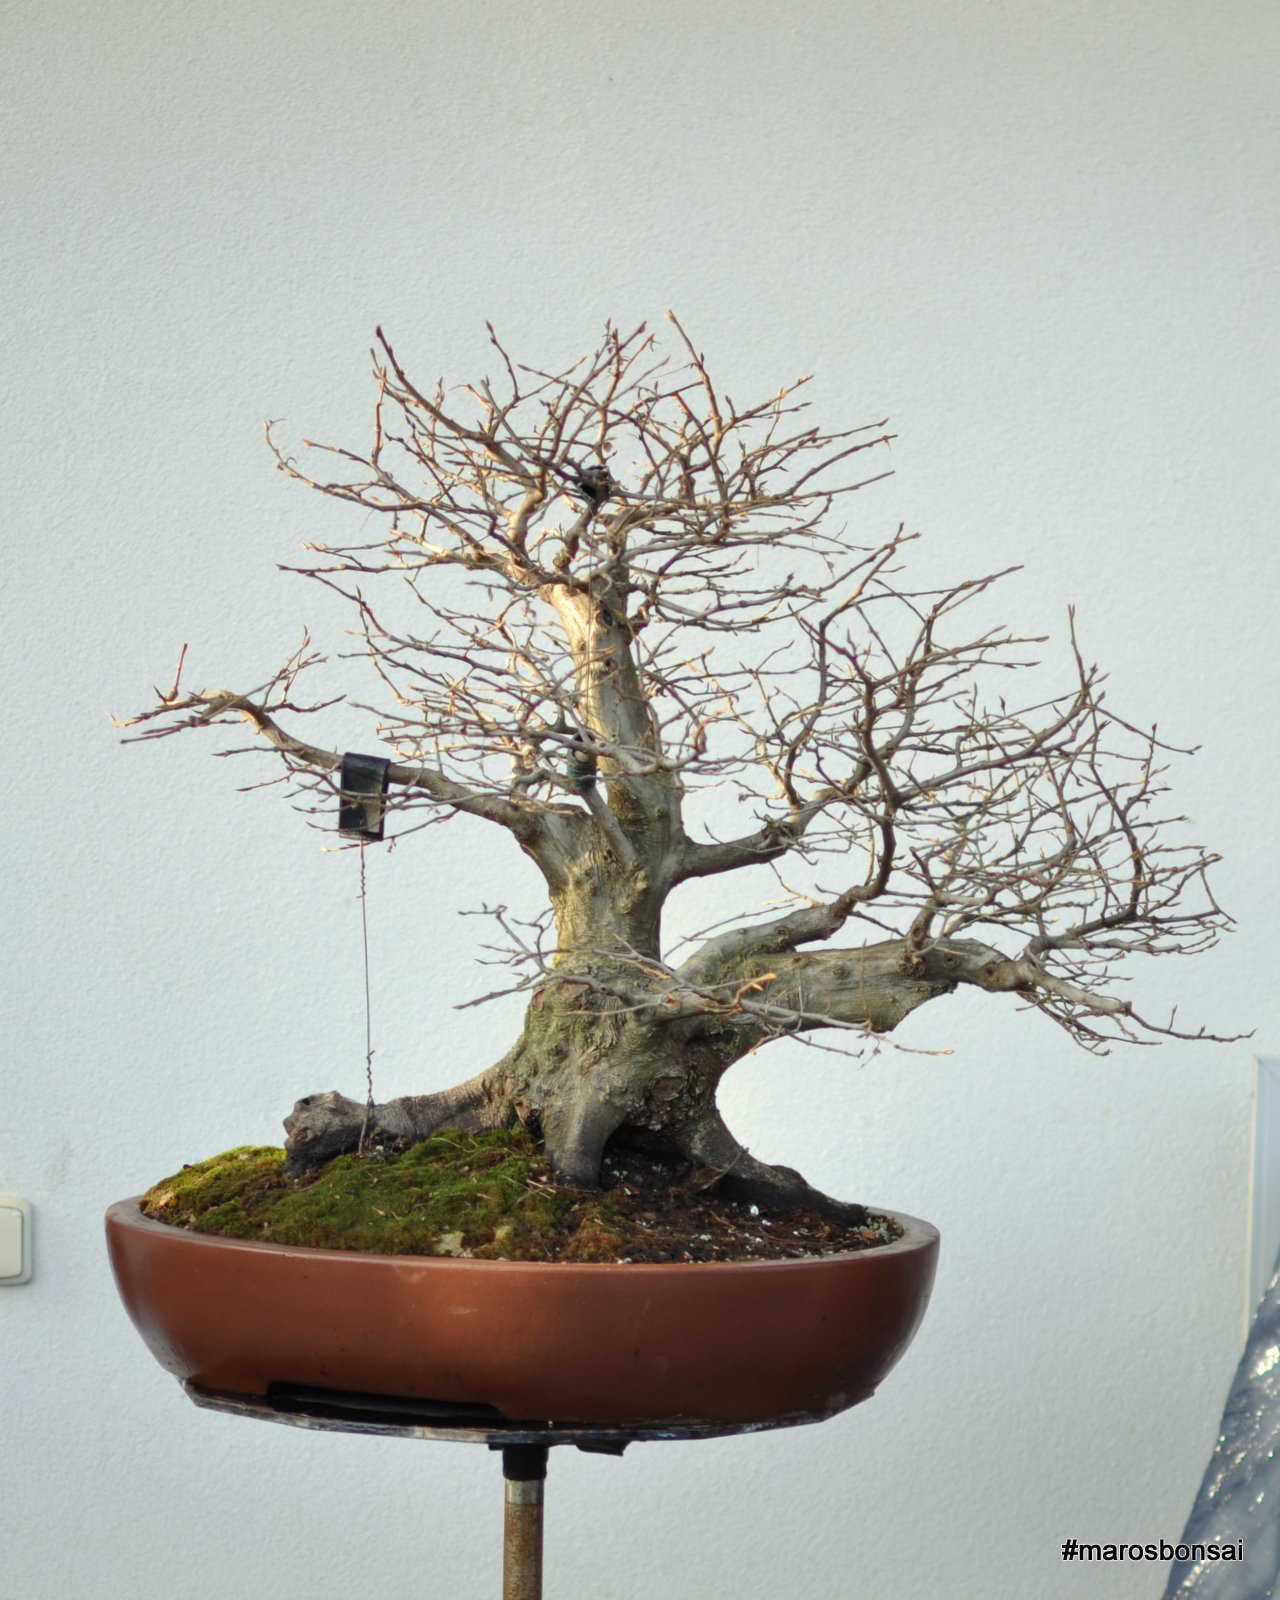
I like
how much change this bonsai made during last 2 years, and generally
from its collection from the wild. Looking on finished tree recently
I was more than happy, I have to say. I like how it looks now, even
if it looks too much like bonsai and not so much like the natural
tree. Or it is only my actual feeling?
I will
see how it will look like with leaves on, and than later in next
season. But I can imagine, it will look even better after few more
seasons, when branch structure will be much more refined and the tree
will have better 'mochikomi'.
 |
| my favorite nebari detial, connected roots, stone, scars... |
When working with it this week, I was
thinking about scars on the branches and I think about drill them and
connect holes together, may be this way the tree will look older and
more natural. I will think about it during the season and may be
start to work on it.
 |
| stump from die back branch, my mistake, cut it too short. And problematic trunk spot with bark peeled off, fortunately not growing, hopefully slowly healing. |
When potting this bonsai into pot last
year there was problem of getting all roots below ground level.
Mainly, because of larger roots are curved and their shape did not
allow to do it. So, one of the major roots must have stayed over the
ground level. After some time I took Dremel and worked it a bit.
Edited it with flame torch and steel brush, and so on. Now it looks
good to me. We will see how it will look like after few more years of
natural ageing process.
 |
| Detail of root which must have stayed above ground level... |
 |
| ...carved... |
 |
| ...burned... |
 |
| ...weathered this week. |